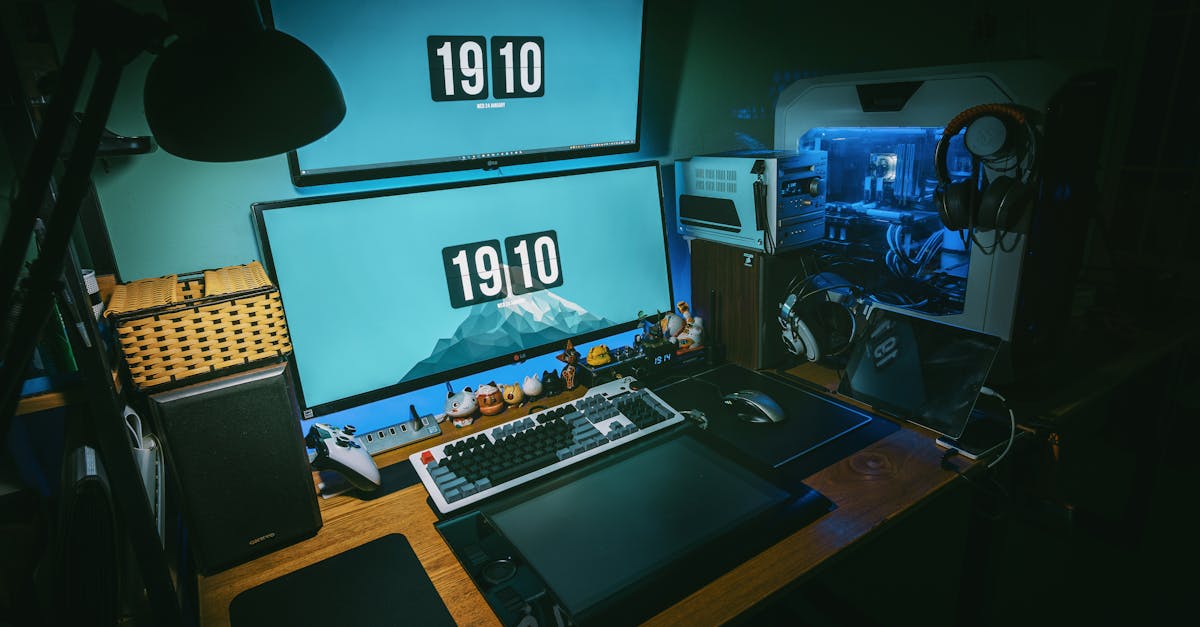
Why Your New Gaming Monitor Feels 'Off' (And What Actually Works to Fix It)
You just unboxed your shiny new gaming monitor, plugged it in with an almost reverent sense of expectation, fired up your favorite competitive title, and… something feels wrong. The colors might look washed out, the motion might seem blurry, or maybe there’s a subtle but nagging delay between your mouse click and the on-screen action. It’s not the buttery-smooth, ultra-responsive experience you shelled out good money for. You expected a definitive upgrade, a competitive edge, and instead, you’re left wondering if you made a mistake or if your eyes are just playing tricks on you. In my experience, this isn’t uncommon, and it’s almost never the monitor’s fault. The mistake I see most often is simply plugging it in and assuming default settings will unlock its potential. What changed everything for me, and for countless others I’ve advised, was understanding that a gaming monitor is a performance instrument, not a plug-and-play appliance. It demands calibration and specific configuration to truly sing.
Key Takeaways
- Don’t rely on default monitor settings; always calibrate your display for color accuracy and optimal gaming performance.
- Understand the difference between refresh rate and frame rate, and ensure your system is consistently hitting your monitor’s maximum refresh rate.
- Input lag often stems from GPU settings or outdated drivers, not just the monitor itself; optimize these first.
- Properly configure FreeSync/G-Sync to eliminate screen tearing without introducing noticeable input lag.
Your Default Settings Are Sabotaging Your Experience
The biggest and most pervasive issue I encounter when people complain about their new gaming monitor feeling ‘off’ is that they’re running it on factory default settings. Manufacturers often ship monitors with a ‘Vivid’ or ‘Dynamic’ preset that, while initially eye-catching on a showroom floor, is utterly terrible for gaming accuracy and long-term viewing comfort. These presets crank up saturation, contrast, and sharpness to artificial levels, leading to eye strain, crushed blacks, blown-out whites, and colors that are far from natural. For gaming, especially competitive titles, accurate color representation is crucial for spotting enemies in varied environments, and a balanced image prevents fatigue during long sessions.
Think about it: a professional photographer wouldn’t trust their work to an uncalibrated display. Gamers, particularly competitive ones, should adopt a similar mindset. The Standard or sRGB preset is usually a better starting point, as it aims for a more balanced color profile. However, even these often need fine-tuning. I always recommend going into the monitor’s On-Screen Display (OSD) and manually adjusting brightness, contrast, and gamma. Brightness should be set to a comfortable level for your room, not maxed out. Contrast should allow you to discern detail in both very dark and very bright areas. Gamma influences the perceived brightness of mid-tones; a value of 2.2 is standard for most content. This initial manual tuning makes a profound difference, transforming a garish display into one that’s pleasant, accurate, and easier on the eyes, directly impacting your ability to focus and react in-game.
Beyond basic image quality, default settings also frequently overlook crucial gaming-specific features. Response time overdrive, for instance, is often set too low or too high by default. Too low, and you get noticeable ghosting. Too high, and you introduce inverse ghosting or ‘overshoot’ artifacts. Finding the ‘sweet spot’ is critical and almost always requires manual adjustment and testing, typically using specific test patterns or in-game observation. Don’t just accept what the monitor gives you out of the box; it’s almost certainly not optimized for your specific setup or preferences.
The Refresh Rate vs. Frame Rate Mismatch
Many gamers equate a high refresh rate monitor (e.g., 144Hz, 240Hz) with an automatically smooth experience. The reality is far more nuanced. A high refresh rate monitor simply can display more frames per second; it doesn’t generate them. If your GPU isn’t consistently producing frames at or near your monitor’s refresh rate, you won’t experience that advertised smoothness. This is a fundamental misunderstanding I see often. A 144Hz monitor running a game at 60 FPS will still feel like 60 FPS – albeit with potentially less input lag than a 60Hz monitor – and you won’t reap the full benefits of your investment.
The first step is to ensure your operating system is actually set to the correct refresh rate. Believe it or not, Windows often defaults to 60Hz even if you have a 144Hz monitor connected. A quick check in Display Settings > Advanced display settings can confirm this. If it’s not set correctly, change it immediately. This seems basic, but it’s an incredibly common oversight.
Next, you need to monitor your in-game frame rates. Tools like MSI Afterburner with RivaTuner Statistics Server (RTSS) or your GPU’s overlay (NVIDIA GeForce Experience, AMD Radeon Software) can display your FPS in real-time. If your frame rate is consistently well below your monitor’s refresh rate, then your ‘off’ feeling isn’t the monitor; it’s your PC struggling to keep up. This usually means lowering in-game graphical settings or, in some cases, upgrading your GPU or CPU. Remember, a 144Hz monitor needs around 144 FPS for optimal performance. Anything less, and you’re leaving performance on the table.
I’ve also found that capping your in-game frame rate just below your monitor’s refresh rate (e.g., 142 FPS for a 144Hz display) can sometimes lead to a smoother, more consistent experience, especially when using variable refresh rate technologies like FreeSync or G-Sync. This prevents your GPU from occasionally overshooting the refresh rate, which can introduce micro-stutters or tear frames just as the display refreshes. It’s a subtle optimization, but for competitive players, every frame counts.
Battling Input Lag Beyond the Monitor
Input lag is the bane of competitive gamers, and while monitors certainly contribute, they are rarely the sole culprit. Many people assume a new, fast response time monitor will magically eliminate all delay. In reality, input lag is a complex chain reaction involving your mouse/keyboard, USB controller, CPU, GPU, display drivers, game engine, and finally, the monitor itself. If your new monitor feels sluggish, chances are the problem lies upstream in that chain, not just with the panel.
Start by ensuring your GPU drivers are up to date. This is foundational. Outdated drivers can introduce significant processing delays. Next, examine your in-game settings. Many games have a ‘Low Latency Mode’ or ‘NVIDIA Reflex’ setting. These are designed to minimize input lag by optimizing the rendering pipeline, often by reducing the render queue. Enabling these can make a noticeable difference, especially in fast-paced shooters.
Another often-overlooked area is background processes. Running numerous applications, especially resource-intensive ones, can bog down your CPU and introduce system-wide latency. Close unnecessary apps, browser tabs, and background downloads when gaming. Furthermore, some Windows power settings or ‘Game Mode’ features can sometimes increase latency rather than reduce it, paradoxically. Experiment with these settings; a ‘High Performance’ power plan in Windows, combined with manual game optimizations, often yields better results than relying solely on automated ‘Game Mode’ features.
Finally, check your connectivity. While DisplayPort is generally preferred for high refresh rates and G-Sync/FreeSync, make sure your cable is high quality and fully capable of handling the bandwidth. Cheap or older HDMI cables might not support the full refresh rate or resolution, leading to a degraded experience. It’s a small detail, but a surprisingly frequent source of frustration. A robust, certified DisplayPort 1.4 or HDMI 2.1 cable is a worthwhile investment for a high-performance gaming setup.
The G-Sync/FreeSync Conundrum: Tearing vs. Stutter
Variable Refresh Rate (VRR) technologies like NVIDIA’s G-Sync and AMD’s FreeSync are transformative, eliminating screen tearing without the input lag penalty of traditional V-Sync. However, if not configured correctly, they can actually contribute to the ‘off’ feeling. The goal is buttery-smooth motion, but improper setup can lead to micro-stutters, flicker, or even increased perceived latency.
The first step is verifying that VRR is actually enabled. For G-Sync, this means enabling it in the NVIDIA Control Panel under ‘Set up G-SYNC’ and often specifically for full-screen mode. For FreeSync, it’s usually enabled in the AMD Radeon Software, and sometimes also needs to be activated within the monitor’s OSD itself. I’ve seen monitors where FreeSync is ‘off’ by default even if the monitor supports it.
The biggest mistake I see with VRR is not combining it with a frame rate cap. While VRR prevents tearing within its operational range, if your FPS exceeds your monitor’s maximum refresh rate, tearing will reappear. Conversely, if your FPS drops significantly below the VRR floor (often 48Hz), some monitors can exhibit flicker or stutter. To combat this, I always recommend setting a global frame rate cap in your GPU control panel (or in-game, if available) a few frames below your monitor’s maximum refresh rate. For a 144Hz monitor, cap it at 141-143 FPS. This keeps your frames within the VRR window, ensuring tearing is eliminated and minimizing any potential stutter from exceeding the refresh rate.
Another common misconception is that VRR somehow magically fixes low frame rates. It doesn’t. If you’re running a game at 45 FPS on a 144Hz monitor with FreeSync enabled, it will prevent tearing, but it will still feel like 45 FPS. The motion clarity benefits of high refresh rates still require high frame rates. VRR simply smooths out the variations in frame rate, making dips less jarring. It’s a synchronization technology, not a performance enhancer. Understanding this distinction is key to setting realistic expectations and optimizing your experience.
Environmental Factors and Ergonomics
While we often focus on the technical specifications of a monitor, external factors play a significant, yet frequently overlooked, role in how a new display feels. Your viewing environment and physical setup can drastically impact comfort, perceived image quality, and even your performance over long gaming sessions. When your monitor feels ‘off,’ it could be your eyes, not the electronics.
Consider your room lighting. Direct glare from a window or an overhead light reflecting off your screen can wash out colors and make text difficult to read, leading to eye strain. Conversely, a completely dark room, while popular for ‘immersion,’ can also be detrimental. The stark contrast between a bright screen and a dark background forces your eyes to constantly adapt, causing fatigue. I personally advocate for bias lighting – a soft light source placed behind your monitor. This reduces the overall contrast ratio between the screen and its surroundings, making viewing more comfortable and improving perceived black levels. It’s a game-changer for reducing eye strain during late-night gaming.
Your monitor’s position and height are also critical. Many people simply place their new monitor on their desk without adjusting it. The top of your monitor should ideally be at or slightly below eye level, and it should be at arm’s length. Tilting it slightly upwards can also help. A monitor that’s too high, too low, or too close/far can lead to neck strain, back pain, and eye fatigue, all of which contribute to an overall ‘uncomfortable’ or ‘off’ feeling, regardless of the panel’s technical prowess. Investing in a monitor arm offers unparalleled flexibility for achieving the perfect ergonomic setup, which is often more impactful on your long-term gaming enjoyment than an extra 10Hz of refresh rate.
Finally, don’t underestimate the power of taking breaks. Staring at a high-intensity screen for hours on end, even a perfectly calibrated one, will inevitably cause fatigue. The 20-20-20 rule (every 20 minutes, look at something 20 feet away for 20 seconds) is a simple yet effective way to give your eyes a much-needed rest. Hydration and blinking regularly also play a role. Your perceived ‘off’ feeling might just be your body telling you it needs a moment to reset.
Color Accuracy and Calibration: The Professional Touch
For many gamers, ‘good enough’ colors are acceptable. But if you’re serious about your visual experience, or if your new monitor simply looks ‘wrong’ compared to your old one, proper color accuracy and calibration are paramount. This goes beyond the basic adjustments in the OSD and ventures into the realm of hardware calibration. While it might sound intimidating, it’s often the missing piece for truly professional-grade visuals.
Monitors, especially gaming-focused ones, often arrive with a blueish tint or exaggerated reds. This is done to make them ‘pop’ on a store shelf, but it ruins accurate color reproduction. The sRGB mode is generally the most color-accurate preset available in the OSD and should be your starting point if you’re not using a calibration device. This mode typically restricts the color gamut to the standard sRGB space, which most games and web content are designed for, preventing over-saturation.
However, for true accuracy, a hardware calibrator like a Datacolor SpyderX or X-Rite iDisplay Studio is invaluable. These devices measure the monitor’s output and create a custom ICC profile for your specific display and GPU, correcting for any factory deviations. The difference a proper calibration makes is stark: colors become lifelike, whites are truly white, and gradients are smooth without banding. For content creation or simply enjoying games with the visual fidelity the developers intended, this is a non-negotiable step. It ensures that the ‘red’ you see on screen is the same red everyone else is seeing, making visual cues consistent and reliable.
In my own setup, calibrating my monitors was the single biggest upgrade to my visual experience, far beyond what any OSD adjustment could achieve. It’s an investment, yes, but for eliminating that ‘off’ feeling and ensuring you’re seeing everything as it should be, it’s worth every penny. You wouldn’t trust a race car without a tune-up; don’t trust your high-performance display without a proper calibration.
Frequently Asked Questions
Q: My new monitor has terrible ‘ghosting.’ What can I do?
A: Ghosting is often related to the monitor’s response time overdrive setting. Go into your monitor’s OSD and look for a setting like ‘Overdrive,’ ‘Response Time,’ or ‘TraceFree.’ Experiment with different levels. Too low, and you get ghosting; too high, and you get ‘inverse ghosting’ or ‘overshoot’ (artifacts that look like faint trails ahead of moving objects). There’s usually a sweet spot. Test each setting using a UFO Test or in-game observation. Also, ensure you’re using a DisplayPort cable capable of your monitor’s full refresh rate.
Q: My colors look washed out or too saturated. How do I fix this?
A: First, try switching to your monitor’s sRGB preset in the OSD. This is usually the most color-accurate setting. If it still feels off, manually adjust brightness, contrast, and gamma. Brightness to a comfortable level, contrast so you can see details in both shadows and highlights, and gamma to 2.2 if possible. For professional-level accuracy, a hardware color calibrator (like Datacolor SpyderX) is the best solution, as it creates a custom color profile for your specific display.
Q: My game’s FPS is high, but motion still doesn’t feel smooth. What’s wrong?
A: Ensure your operating system is set to the correct refresh rate for your monitor. In Windows, go to Display Settings > Advanced display settings and select the highest refresh rate available. If you’re using G-Sync or FreeSync, make sure it’s enabled in both your GPU control panel and potentially your monitor’s OSD. Additionally, cap your in-game FPS a few frames below your monitor’s maximum refresh rate (e.g., 141-143 FPS for a 144Hz monitor) to keep frames within the VRR window and prevent tearing or micro-stutter.
Q: Is it always better to buy the monitor with the fastest response time?
A: Not necessarily. While a low response time (e.g., 1ms GTG) is desirable for competitive gaming, manufacturers’ advertised specs can be misleading and don’t always reflect real-world performance across the entire pixel transition range. More importantly, pushing a panel too hard with aggressive overdrive settings to achieve a low response time can introduce undesirable inverse ghosting. Focus on monitors with consistently good response times across reviews, and remember that real-world factors like input lag (which includes more than just panel response time) are often more impactful on the overall ‘feel’ of responsiveness.
Q: What is the ideal monitor height and distance for gaming?
A: The top edge of your monitor screen should be roughly at eye level, and the screen should be about an arm’s length away from you. This ergonomic setup helps prevent neck strain and eye fatigue during long gaming sessions. Use your monitor’s stand adjustments, or consider a VESA-compatible monitor arm for maximum flexibility, to fine-tune its position to your comfort.
In conclusion, that ‘off’ feeling you’re experiencing with your new gaming monitor isn’t a flaw in the hardware itself, but rather an opportunity for optimization. By moving beyond default settings, understanding the interplay between refresh rate and frame rate, tackling input lag at its source, correctly configuring VRR, and addressing environmental factors, you can unlock the full potential of your investment. Take the time to calibrate and configure; your competitive edge and visual comfort will thank you.
Written by Elias Vance
Hardware reviews, product teardowns, engineering insights
A former R&D engineer, Elias possesses an uncanny ability to dissect new hardware and explain its inner workings.
You Might Also Like
Why Your Car Stereo Has No Bass (And What Actually Works for Deep, Punchy Sound)
Struggling with weak car audio bass? Learn the hidden reasons your stereo lacks punch and discover real solutions for deep, impactful low end.
Why Your New Phone Charger Feels Slow (And What Actually Works for Real Speed)
Discover why your new phone charger might be underperforming and the concrete steps to achieve true fast charging, not just advertised speeds.

Why Your Car Stereo Sounds Muddy (And What Actually Works for Real Clarity)
Is your car audio lacking clarity? Elias Vance explains why factory systems often sound muddy and shares expert tips to achieve crisp, clear sound.